Preparation
Before we dive into this Zapier integration, make sure that you have:
- A Burst SMS account - Sign up for a free 14-day Burst SMS account
- A Zapier account - Sign up
Step 1 - Create a new Zap
After you log into Zapier, click on 'Make a Zap!' on your Zapier dashboard.

Step 2 - Choose a Trigger App
Find and select Burst SMS as the trigger app, and then change the 'Trigger Event' field to 'Link Hit'.
Note: API Secret is like a password. You'll need to type in your own API Secret, then click the Update Profile button at the bottom of the page.

Step 2 - Connect Burst SMS to Zapier
If you haven't connected your Burst SMS account with Zapier, then it will ask you for your Burst SMS API Key and API Secret.
To retrieve your Burst SMS API Key and API Secret, log in and go to Settings and scroll down to the API Settings section.
Note: API Secret is like a password. You'll need to type in your own API Secret.

Next, paste your API Key and API Secret in Zapier.

Step 3 - Set up Zapier Webhook URL in your Burst SMS Account Settings
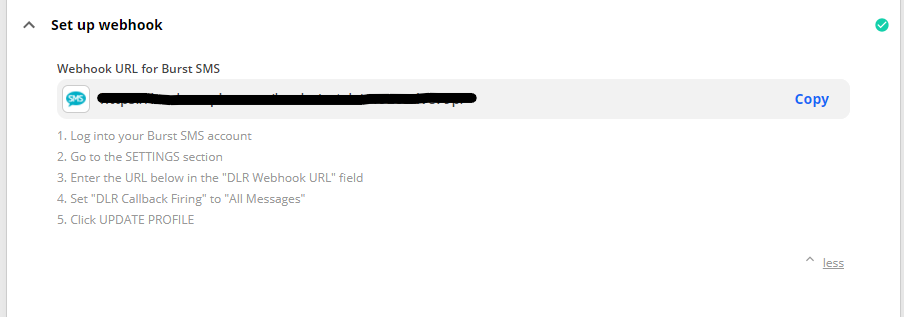
Next, copy the Webhook URL that Zapier provides you.

Go to your Burst SMS Account Settings and paste it into the "DLR Callback URL" field.
For 'DLR Callback Firing,' select 'All Messages'.

Follow the rest of the instructions to make sure that your account has successfully been added to Zapier.
Step 4 - Add Action Delete Contact
Click on the '+' symbol to add a new Action and select Burst SMS.
Change the Action Event to 'Delete Contact'.

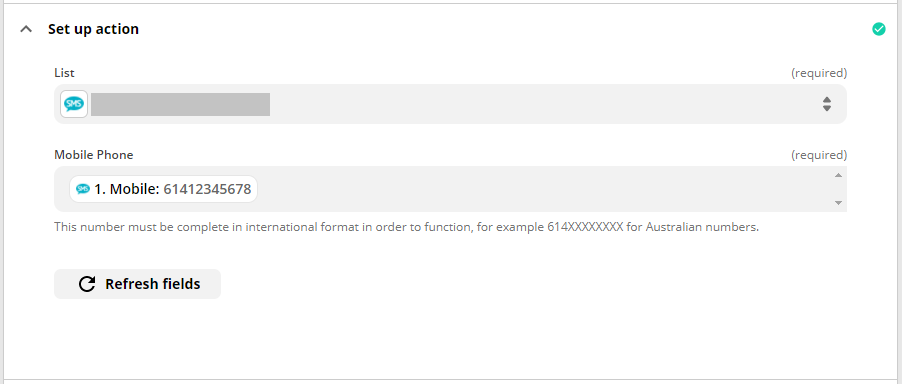
Follow the steps until you get to 'Set up action' section. Here, in the 'List' field, find and select a list you want this automation to use. Other lists will not be affected.
In the 'Mobile Phone' field, and find the 'Mobile' variable. Once selected, it will appear as a rounded rectangle with '1. Mobile:[sample-number]' inside of it as seen below.

Now whenever one of your contacts clicks on your campaign's link, it will be automatically deleted from the list that you have chosen.
Once you've tested the integration and you think it's ready to go, your final step is to turn Zap on.
That’s it! Let us know if you have any questions.
