Using Zapier, there is now an easy way to turn on/off an auto-response for your dedicated number.
For example, let your clients know if it is out of business hours or if you are on leave, by simply texting BEGIN or FINISH to your dedicated number.
NB: This will require two zaps, each with 3 steps. One zap to turn the auto-response ON and the other to turn it OFF.
Please also note, when turning it off, you will receive the auto-response yourself once.
We will be using an API call to do this, information for the call can be found HERE.
ZAP ONE - Turning your auto-response message ON
1. Login in to your Zapier Account or sign up for one HERE.
2. Select "Make a Zap". Trigger: Burst SMS - SMS Received to Virtual Mobile Number

3. Connect your Burst SMS Account (unless previously connected) and click Continue
4. Copy the URL that appears on the next screen
5. Paste this in Notepad (or anywhere else, you will need this for the second Zap)
6. Follow the steps above the URL in Zapier to add it to your Burst SMS Account
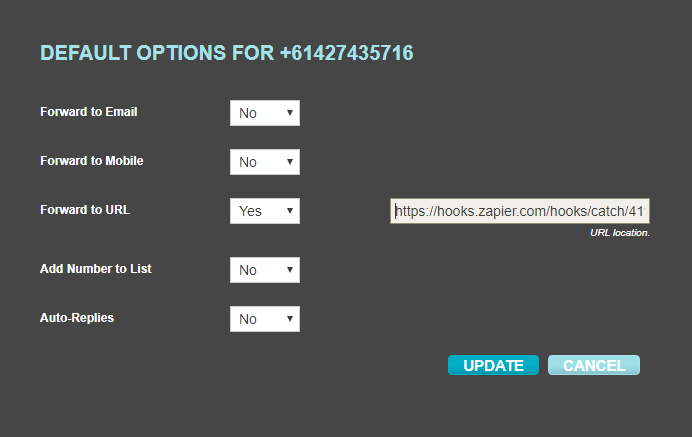
7. Once done go back to Zapier and continue and test this step (you can send a message to your dedicated number for Zapier to pick up)
8. Once Zapier has successfully picked up a message, click Continue
9. For the next Action, select Filter by Zapier - Only continue if...
10. Select Message (from step 1) > (Text) Starts with > Keyword (for example BEGIN1)
NB: We added the 1, to ensure that messages received that started with Begin would not trigger the Zap also
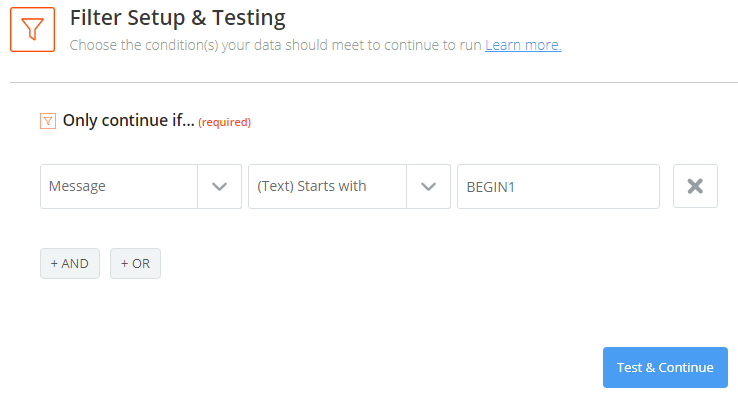
11. Test and continue (Zapier will let you know if the Zap would have continued based on the message you tested with)
12. For the next Action, select Webhooks by Zapier - POST
13. Fill out the form as described below
NB: For the forward_URL, use the URL you obtained from Step 4
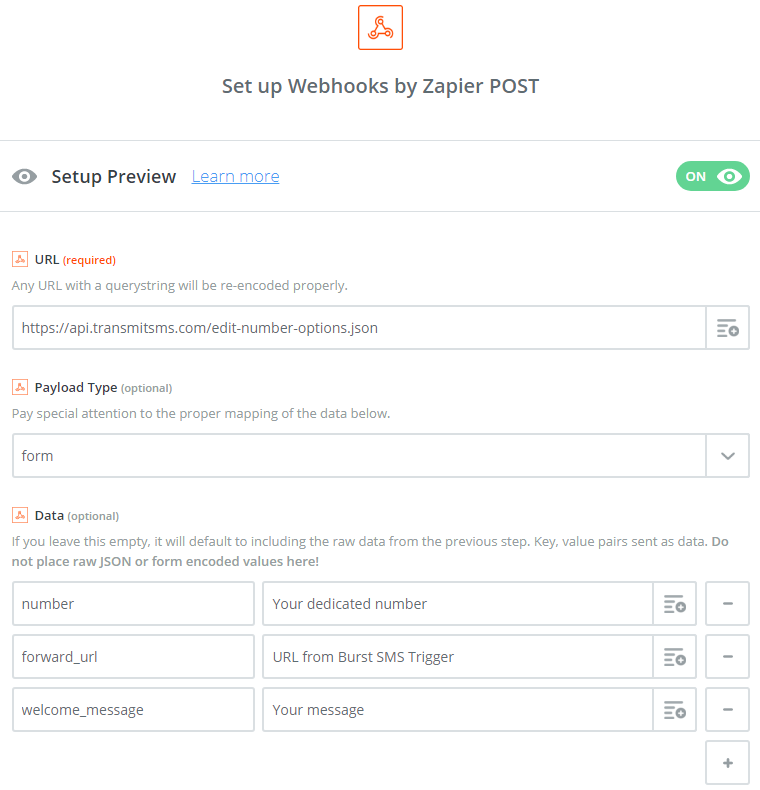
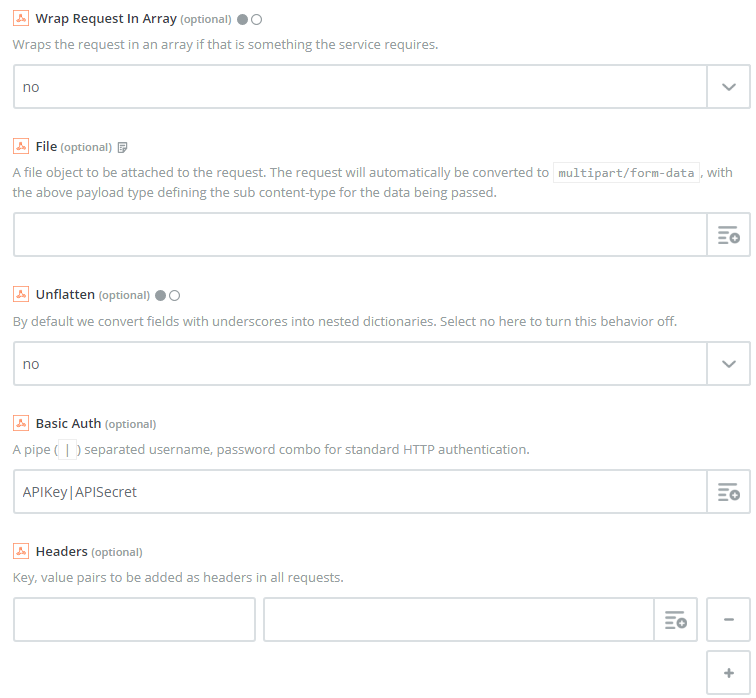
14. Click continue
15. Zapier will confirm if the webhook was successful
ZAP TWO - Turning your auto-response message OFF
1. Trigger: Burst SMS - SMS Received to Virtual Mobile Number
2. Select your Burst SMS account
3. Copy the URL that appears on the next screen
4. Paste this in Notepad (or anywhere else with the other URL. Make sure you remember which is which)
5. Follow the steps to add this URL to your dedicated virtual number (over writing the URL you added for ZAP ONE)
6. Go back to Zapier and perform the same test as you did for ZAP ONE
7. Once Zapier has successfully picked up a message click continue
8. For the next Action, select Filter as you did for ZAP ONE
9. Set out the same as you did for ZAP ONE, except change the Keyword (for example FINISH1)
NB: You can't use STOP as this is reserved for opting-out
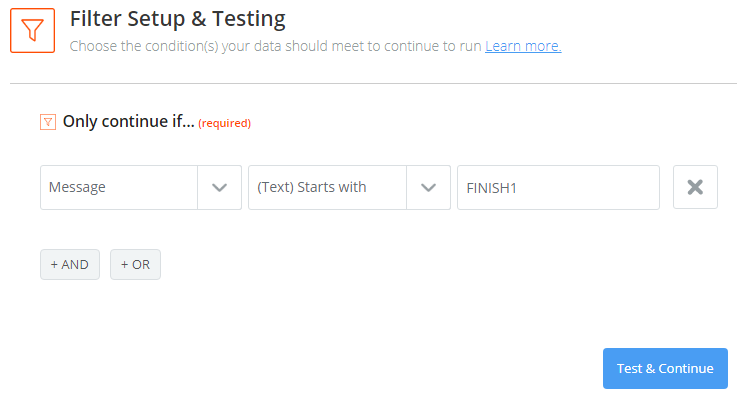
10. Continue and Zapier will tell you if your Zap would have continued based on your test message from earlier
11. For the last Action, select Webhook - Post as you did in ZAP ONE
12. Fill out the form as per below
NB: For the forward_url, use the URL you obtained from ZAP ONE.


13. Click continue and Zapier will confirm if your Webhook was successful
14. Save this Zap
15. Go back to ZAP ONE (via your Zapier Dashboard) and edit it
16. Go to the Webhook Action and select "Edit Template"
17. For forward_url, change this to be the URL you obtained from ZAP TWO
18. Save this Zap and you're all done!
